royalrampsandrails
  • HOW TO BUILD A HALF PIPE
  • ABOUT
  • ITEM SHOP
  • GALLERY
    • Pictures
    • Videos
  • BLOG
  • MERCHANDISE
  • CONTACT
  • HOW TO BUILD A HALF PIPE
  • ABOUT
  • ITEM SHOP
  • GALLERY
    • Pictures
    • Videos
  • BLOG
  • MERCHANDISE
  • CONTACT
  royalrampsandrails

Half Pipe - Design Step 5

6/7/2013

0 Comments

 
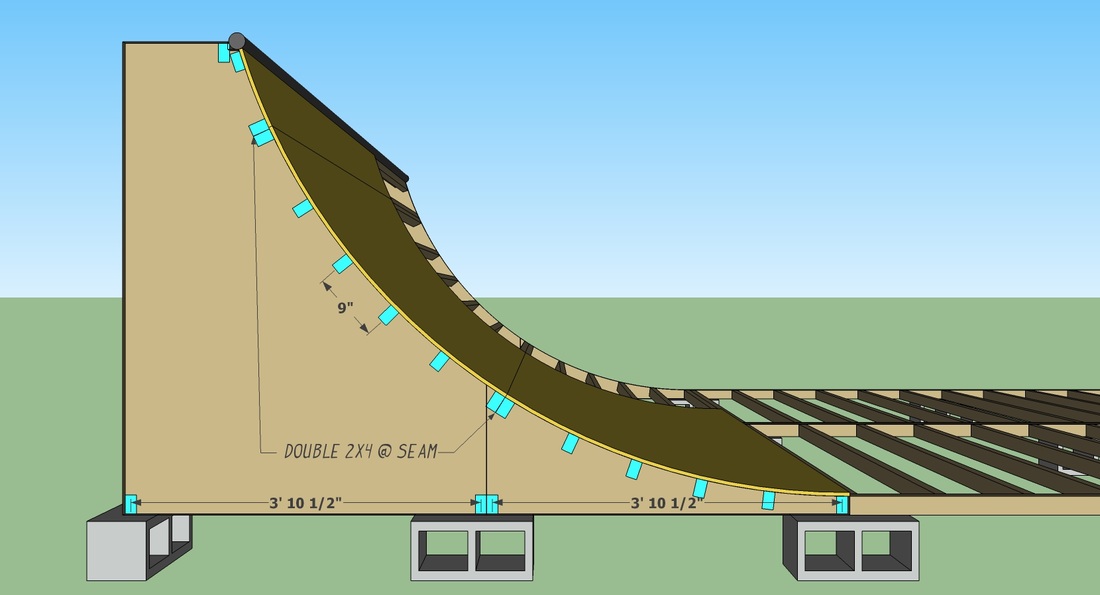
You want to use a similar approach for designing the transition supports studs as you did on the flat section; however this is the main impact section so you’ll want them closer together. The closer they are the less chance of punching through the ply when you come down from that monstrous indy. This ramp is designed with the studs laid out 9 inches, center to center. Another factor that needs thought before you lay out the studs is where the plywood seam is going to fall. The seams will be every 4 feet from the start of the transition.
Picture
Picture
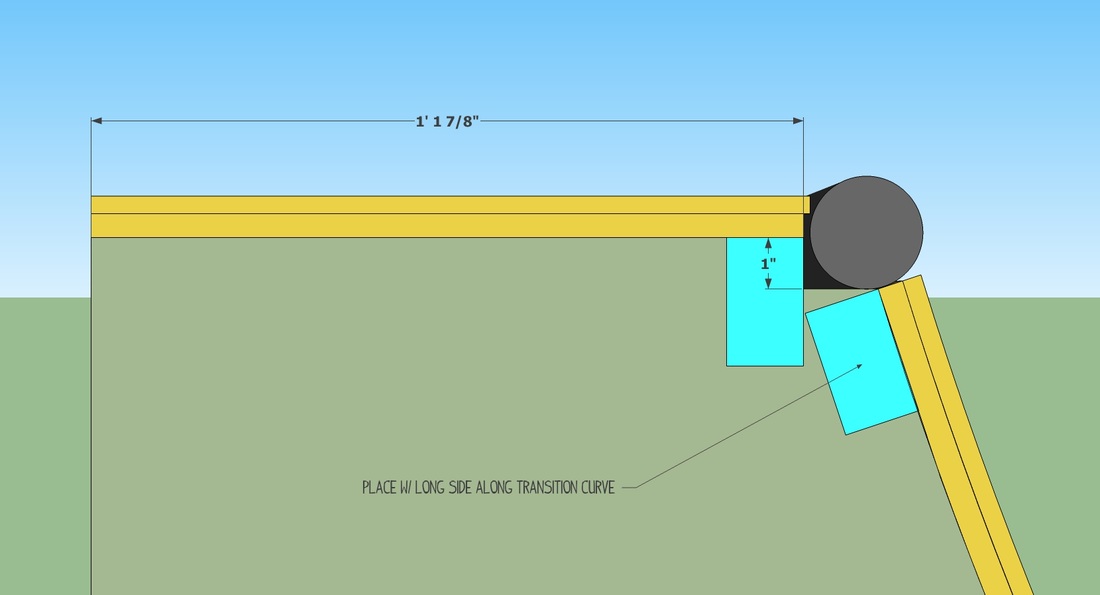
Finally we must know where the coping is going in order to place the studs that support it. We will be using 2” EMT conduit for the coping which has a 2.2” outside diameter. You want your coping to stick out at least a ¼” on the top and front. To achieve this, the top two studs will need to be arranged as shown in the below diagram.
Picture
0 Comments


Leave a Reply.

    HOW TO DESIGN A HALF PiPE

    All
    3. FRAMING THE FLAT
    4. CUTTING THE TRANSITIONS OUT
    5. STAIN THE TRANSITION
    5.) Transition Studs
    6. BUILD THE TRANSITIONS
    Art
    Half Pipe
    New Designs

    HOw TO BUILD a half pipe

    All
    3. FRAMING THE FLAT
    4. CUTTING THE TRANSITIONS OUT
    5. STAIN THE TRANSITION
    5.) Transition Studs
    6. BUILD THE TRANSITIONS
    Art
    Half Pipe
    New Designs

Powered by Create your own unique website with customizable templates.