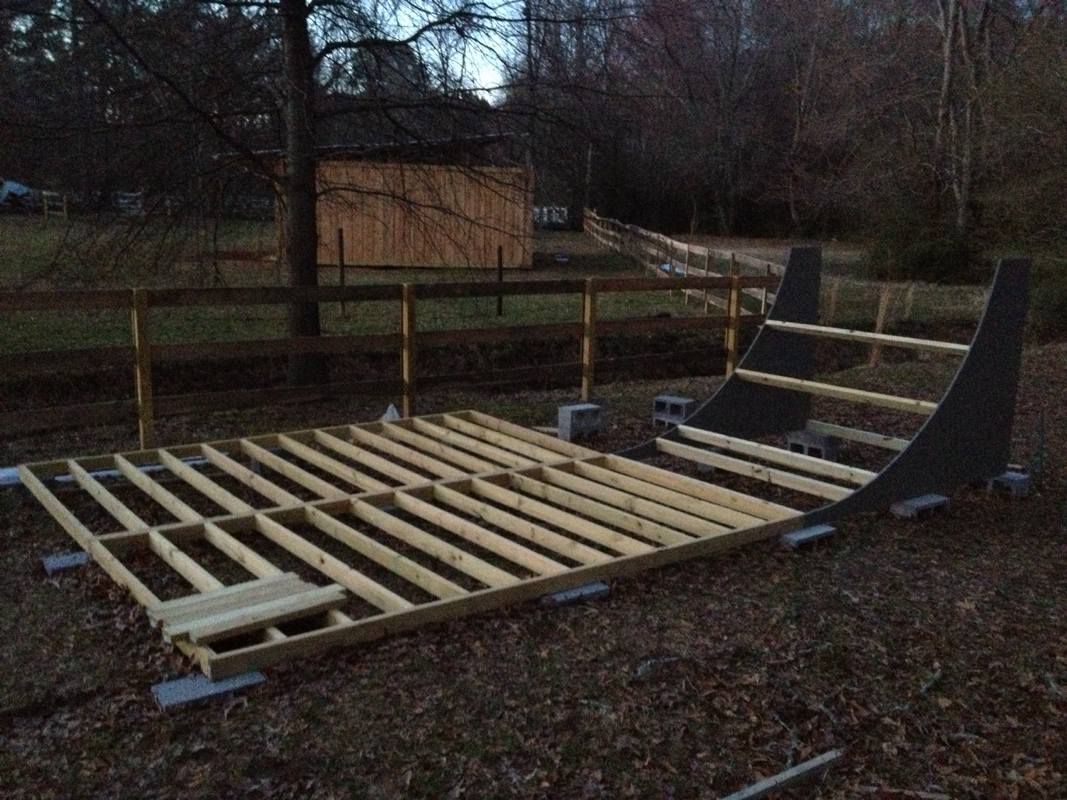
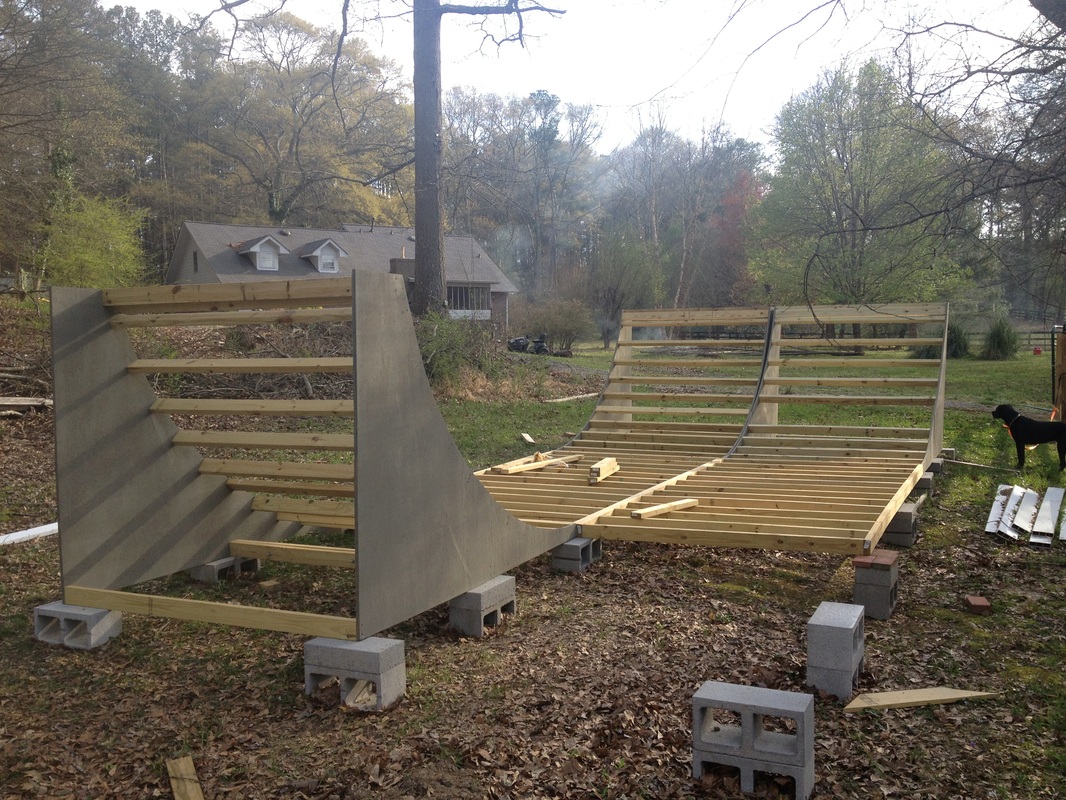
Wow! It’s been a while since I posted, probably because I finished the ramp and have been too busy skating, but I am determined to finish this blog about my half pipe build... so here we go. Putting together the transitions is what I'll be talking about today. Use your measurements from Design Step 5 and layout all of your supports on each transition’s side piece. Cut out all of your 2x4s to length and make sure you subtract the thickness of the plywood. You will want a buddy for this next step. Stand up one transition side and screw a 2x4 to it from the outside, start with the 2x4 at the very bottom where the transition meets the flat section. Use a minimum of two screws. Stand up the opposing side and screw it to the 2x4. Follow your layout markings and keep screwing 2x4s on one side and then other until you have complete ¼ pipe. Build three more ¼ pipes and your ramp will be all framed up.
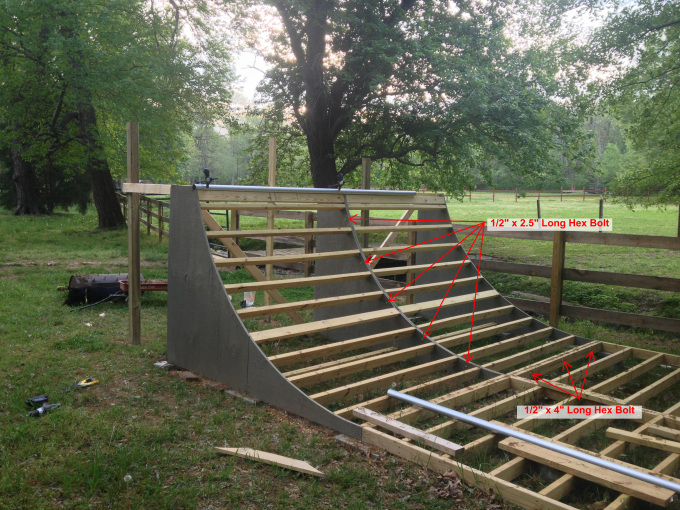
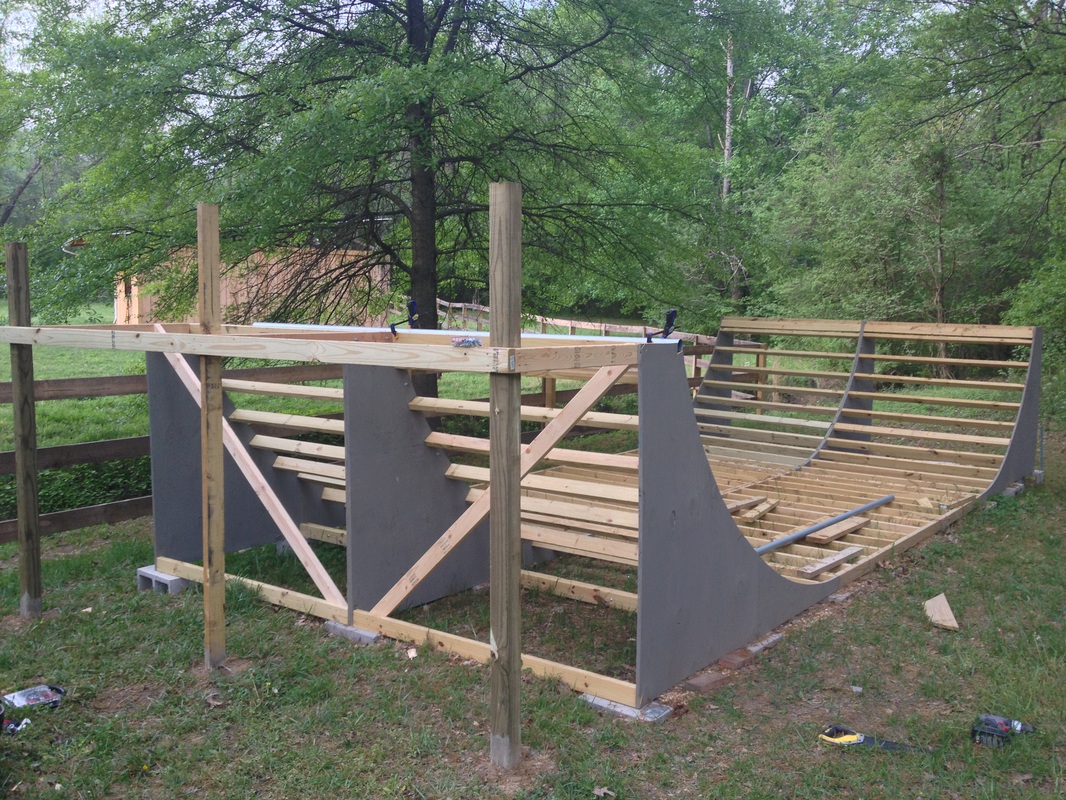
Once all your quarter pipes are built and in position you need to bolt them to the flat section and to one another. Also a good idea but not necessary is to stabilize the quarter pipes with some cross bracing. See below photos.