Finally got all my foundation blocks laid out!
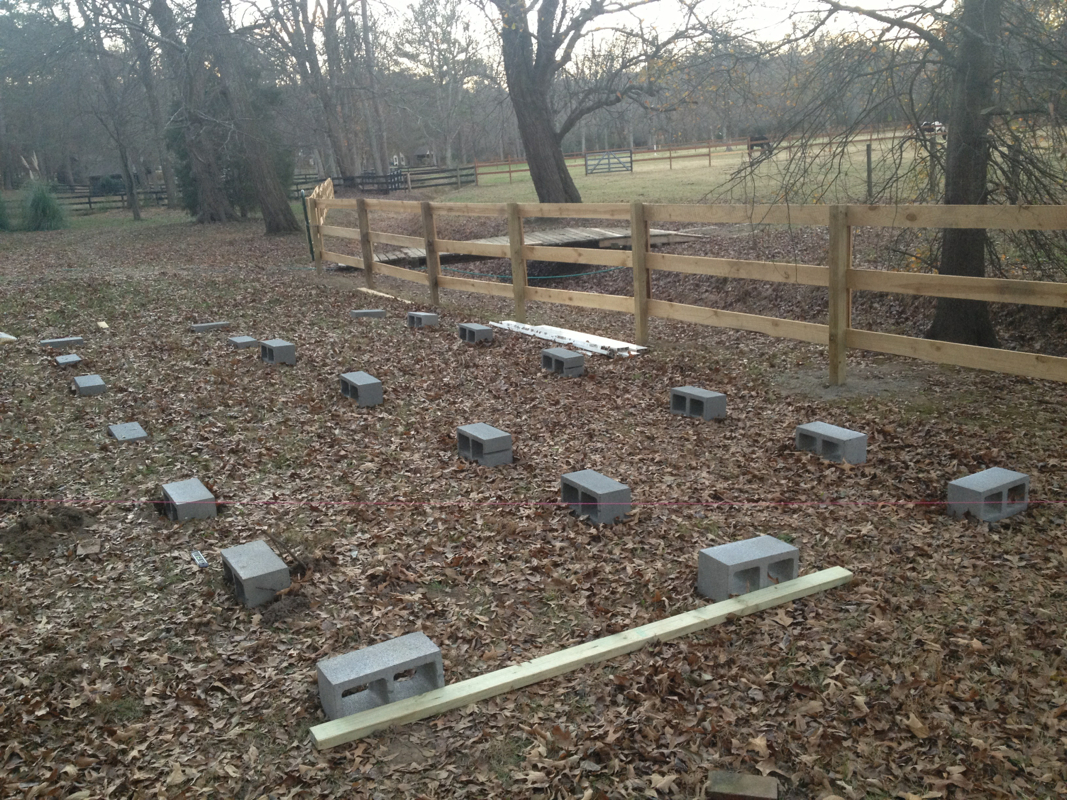
You will need 21 blocks for this design. The blocks you will need are 8x8x16. My site is a lot lower on one end then the other so I got some thinner blocks (4x8x16) for the low side.
Before you start laying out your blocks I found it super helpful to cut three pieces of scrap wood to the three dimensions between the blocks. (1 = 2'10", 1 = 5'4", 1 = 4' 8-3/8") This will save from having to pull out the tape a thousand times. Getting somebody to help you with this would also save a bunch time.
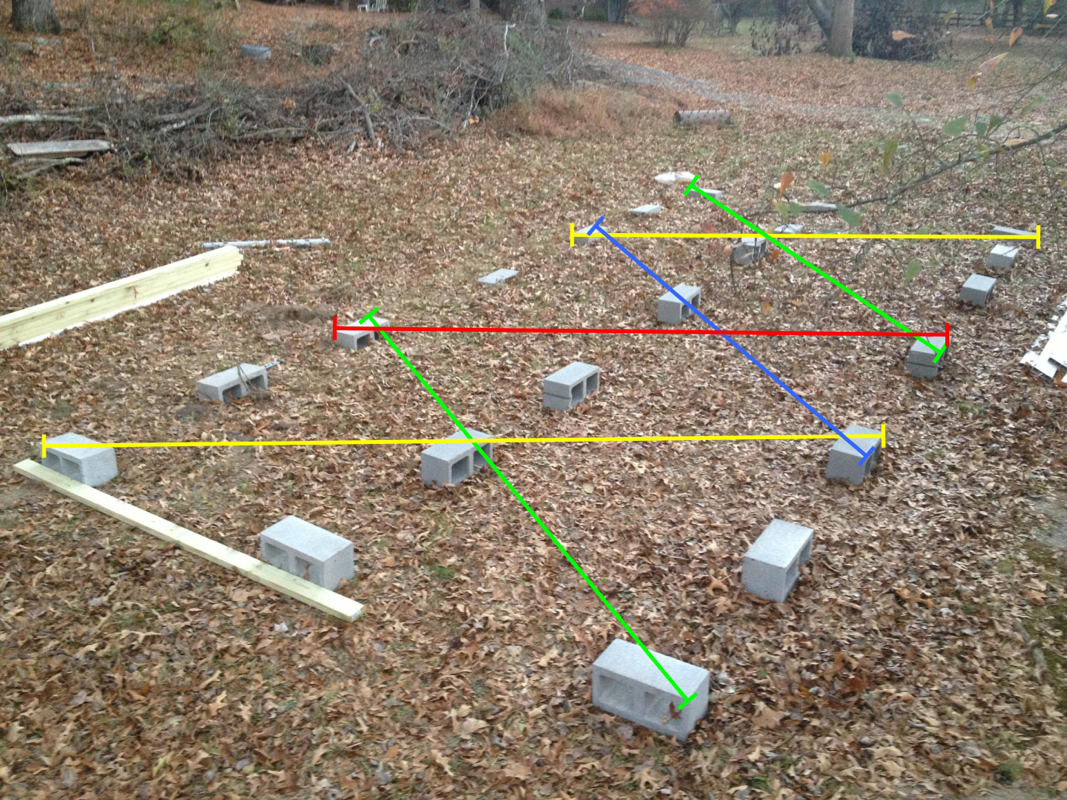
Once you have them all laid out you want to check and make sure they are square. You do this by measuring diagonally across the blocks. I broke it up into 3 sections, see above picture. The green lines should = the yellow lines and the red line = the blue line.
Next step is to start leveling the blocks.
Tools needed for this step:
Materials needed for this step:
- tape measure
- hand saw or circular saw
Materials needed for this step:
- 21 concrete blocks = $1.25ea.
